PC Station Simatic Net Configuration
PC Station Simatic Net Configuration
From the practical Driver SI7 Configuration, we start from the basis that we have configured our Simatic PC station, as here we will see the steps from the beginning to make this configuration. We have two options to create the configuration, either with Step7, but if we only have Simatic Net installed, we will do it with the Simatic NCM PC Manager. This is the case we will see next, we have installed FIX32, iFix or another application and the installation of Simatic Net.
We will start from scratch and with all the steps, we start by creating a new project

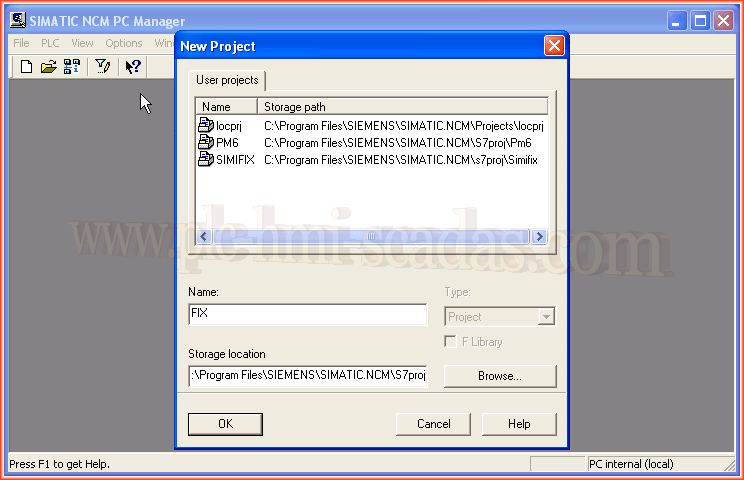
We have assigned the project name that interests us, and then, right-click on the name of our project and a menu appears, and we will insert a new object of the type Simatic PC Station


IMPORTANT: The name of our object is PCStation, without the blank space. The screenshot was taken before changing the name and may cause confusion throughout the tutorial
Once our object is inserted, we will open it to perform the hardware configuration that interests us.
To insert the hardware, we go to the tree and expand SIMATIC PC Station, the first thing we are going to insert is our network card


As it is an empty project, we do not have any network configured, so we will tell it that we are going to create a new one in the new button

We assign the network the name that interests us, or leave the one assigned by default and continue with the configuration where the next step is to assign the IP address, this will be the IP address of the equipment, of our PC


We already have our network card, the next step is to insert an object of the type Application, we expand in the tree to User Application --> Application and select

We assign the name that interests us, and this name will be the one we reference in the application that will communicate, in the example it was with FIX32, but it could be another application or even one developed in C++

We have already configured our hardware, we can now save and compile.

Once saved and compiled, we will open NetPro, for this we press the following icon.

NetPro opens with our station. What we are going to do is create a link of the type S7 Connection and unspecified


We press the Ok button, and continue with the configuration of our link, what remains to define is who will be the interlocutor, for this we specify the IP address, and with the Address Details button, we configure the Rack / Slot
With these steps, the link is already configured, note that I changed the name assigned by default S7 Connection to S7

Finally, we can save and compile. If everything is correct, we will not get any errors and everything has been done correctly.


Details: As we can see, the PCStation icon has a yellow date, which means that the name we assigned to our station matches the one that the rack of the Station Configuration Editor actually has; if it were not so, that arrow would not appear. Since the name we have seen matches, the selected interface is automatically PC internal (Local), which is the one we need if we want to transfer the project from the SIMATIC NCM itself


Here we can see the previous comment in more detail.
If we are interested in changing the name either in the project or in the Station Configuration Manager. In this we have the Station Name button, which opens a pop-up window with the name we want to assign.
This is one of the most important details to keep in mind.
The last change we must make is in the Simatic Net configuration console, defining at the access point which card we are going to use.
As we are going to communicate via TCP/IP and our card is the one integrated into our equipment, that is the one we are going to select for communication CP_L2_1 and CP_L2_2

August 13, 2017