Intouch Simulation with PLCSIM via NETTOPLCSIM
Intouch Simulation with PLCSIM via NETTOPLCSIM
Today we will see how we can simulate our projects made for the S7-300/400/1200 PLC in PLCSIM via nettoplcsim, which you can download here, and I take this opportunity to congratulate Mr. Thomas for this tool. If you use TIA Portal, it is also possible, but I have used Step7 since Intouch is installed on the same machine.
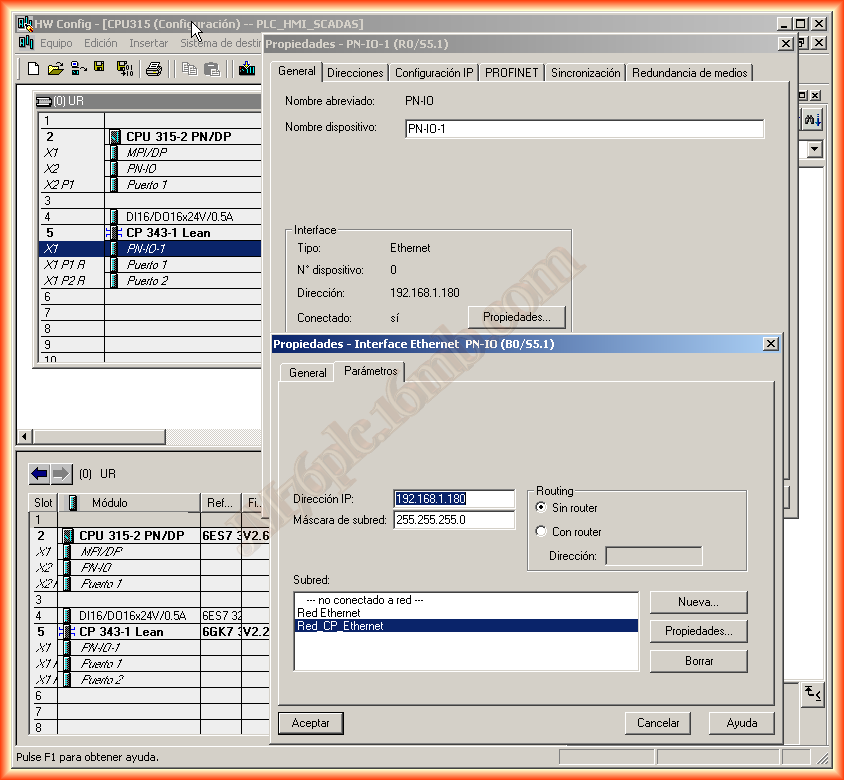
Well, we start from the premise that we have our project and it is essential that it has an Ethernet network since we need to use the TCP/IP protocol for both nettoplcsim and the DA Server DASSIDIRECT from Intouch, which we will use and also see how it is configured.
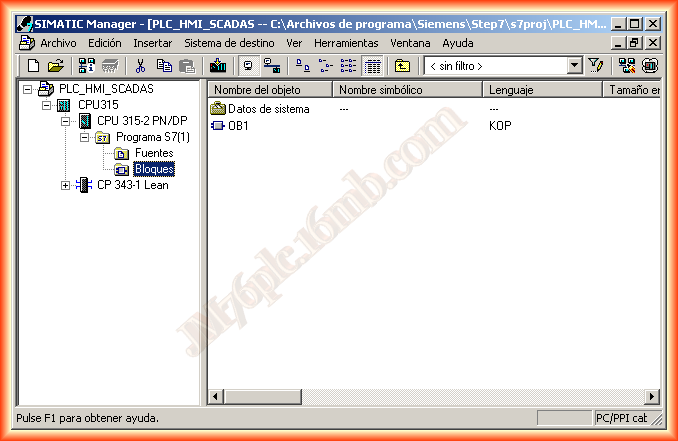
Here is some variable to check later that it works, although ideally it would have been to make a small program

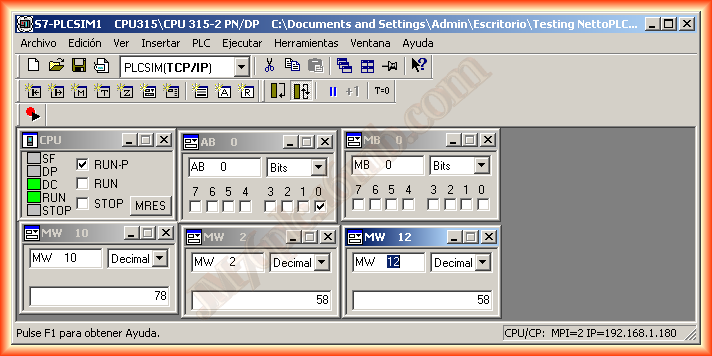
Once the program is created and the hardware configured, we can transfer the project to PLCSIM. Note how you can see the IP we configured in the hardware
We can now start Nettoplcsim, and the first thing that may appear is the following warning, which as it says is due to the SIMATIC IEPG service running that uses port 102. We confirm that we want to stop it, and when we finish our tests, we restart it, although when closing Nettoplcsim, another warning will appear to activate it again.

We click the Add button to add a new link, give it a name that interests us, and then for Network IP Address refer to the IP of the Localhost, which you can check by clicking the button ... and the text field referring to Plcsim refers to the IP we had configured in our project and that we observe in PLCSIM

With these steps, we have configured the link. The new version of Nettoplcsim supports multiple connections, in case there are several PLCs...
We click Start all and it will be observed RUNNING, we have completed this part.

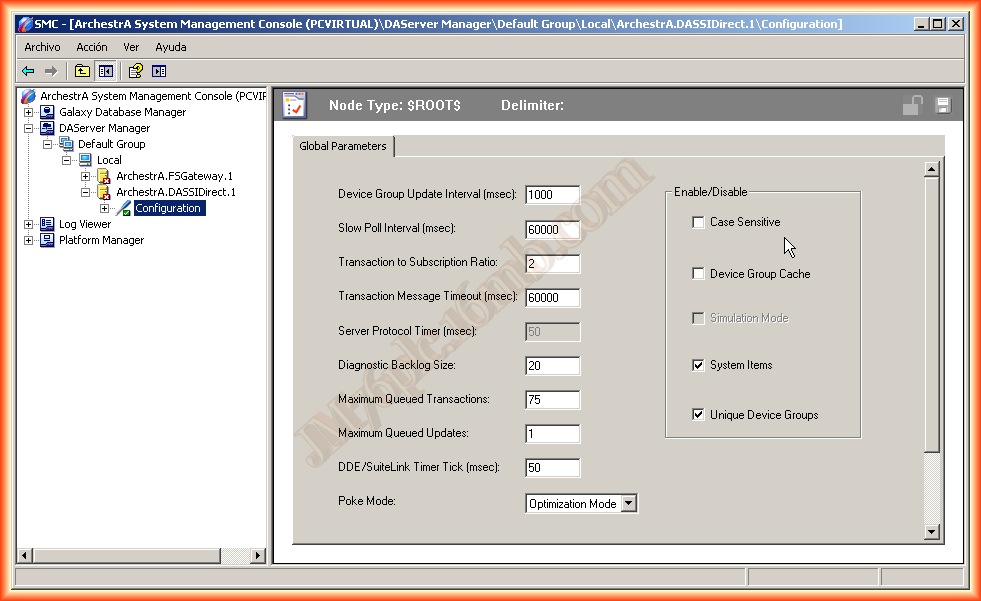
The next thing we are going to do is configure DASSIDirect. To configure any DA Server, we do it in the System Management Console as observed below.

The first image we observe is the Global parameters, which we can skip this step and leave them by default or adapt them according to needs.
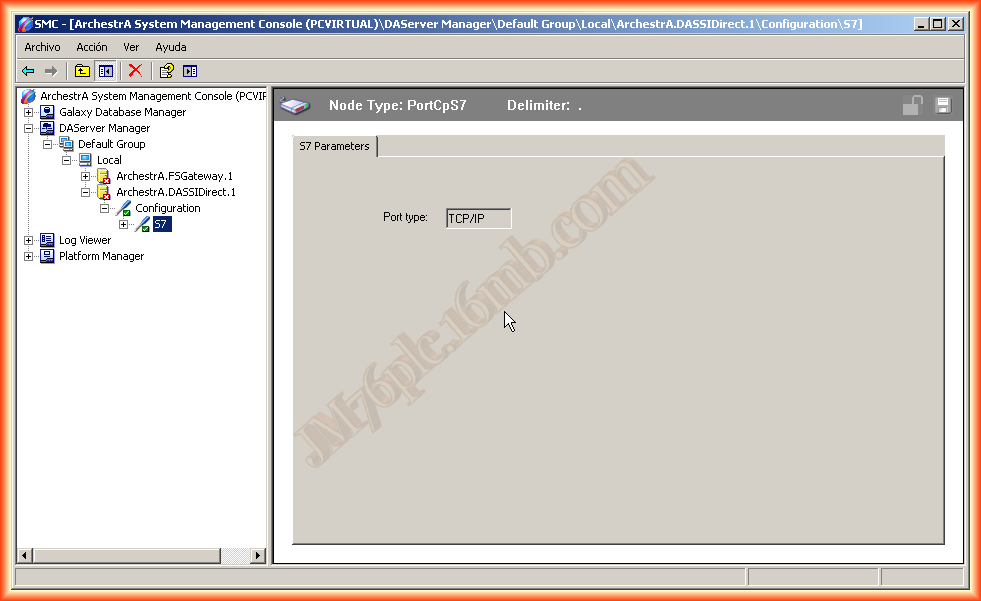
We add a new Object, right-click Add PortCpS7 and rename it if we think it is necessary, as it was essential to have the TCP/IP protocol since this Server is based on it.
We right-click again to add a new object, and select CpS7 which is the one we are interested in for this example, although it is also available if we wanted to configure an S7-200 with its CP 243-1 module.
And here we need to configure in the first step CP Parameters that refer to the CP of the PLC, as we are going to communicate through Nettoplcsim, we choose the IP we had configured, which was the PC's IP, Localhost, and add the Rack where the CP is located and the Slot

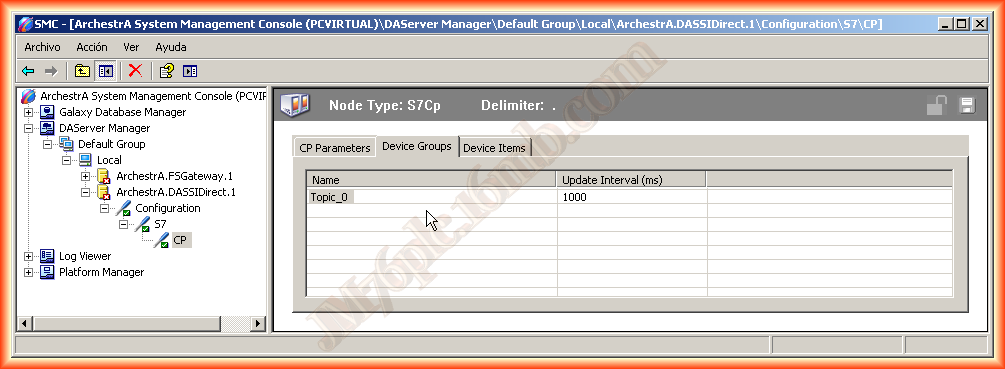
The next thing we do is configure a Topic, the name we use here will be the one we need when we configure a new AccessName in Intouch.
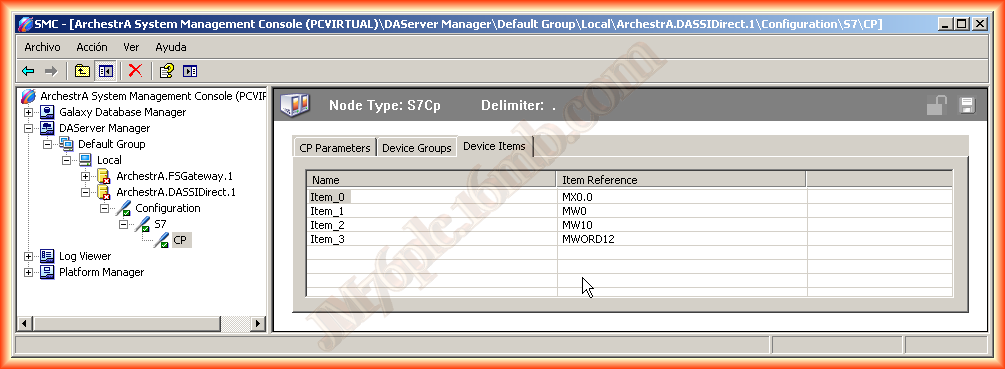
Finally, configure the items, tags, or variables we want to access. Here I recommend looking at the help to check how to create the reference to the item we are interested in. For example, to access a bit of a marker, you can use MX0.0 or to access a word, you can either use MW10 or MWORD10.
Once configured, we save the changes and that's it.
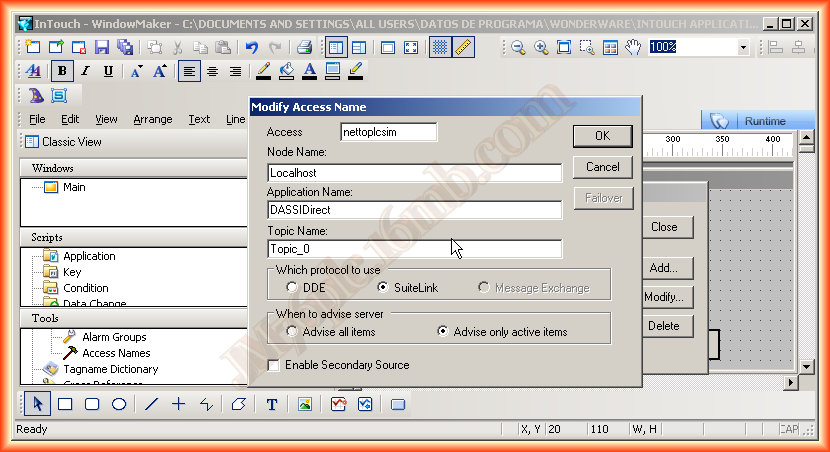
To finish, it is time for the configuration of Intouch, we are going to create a new Access Name.
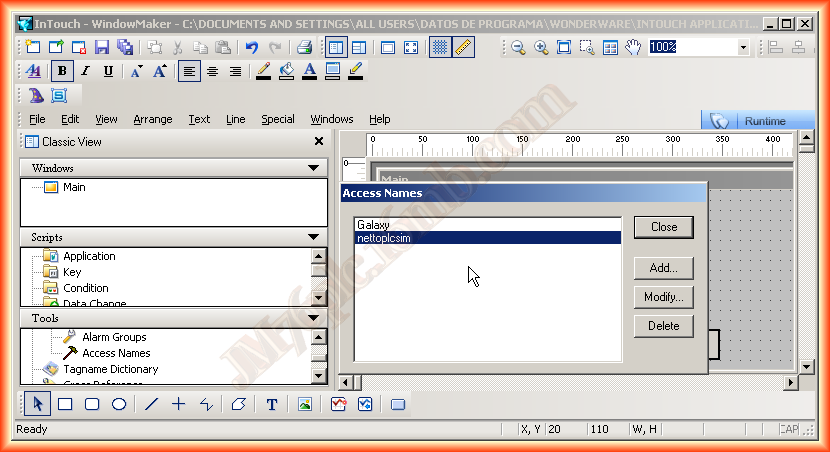
We assign the name that interests us and in Node Name, Localhost if the Server is on the same machine or it can be left blank which is equivalent to Localhost.
Application Name: the Name of the Server which is DASSIDirect and finally the Topic Name: which refers to the name of the topic we created.
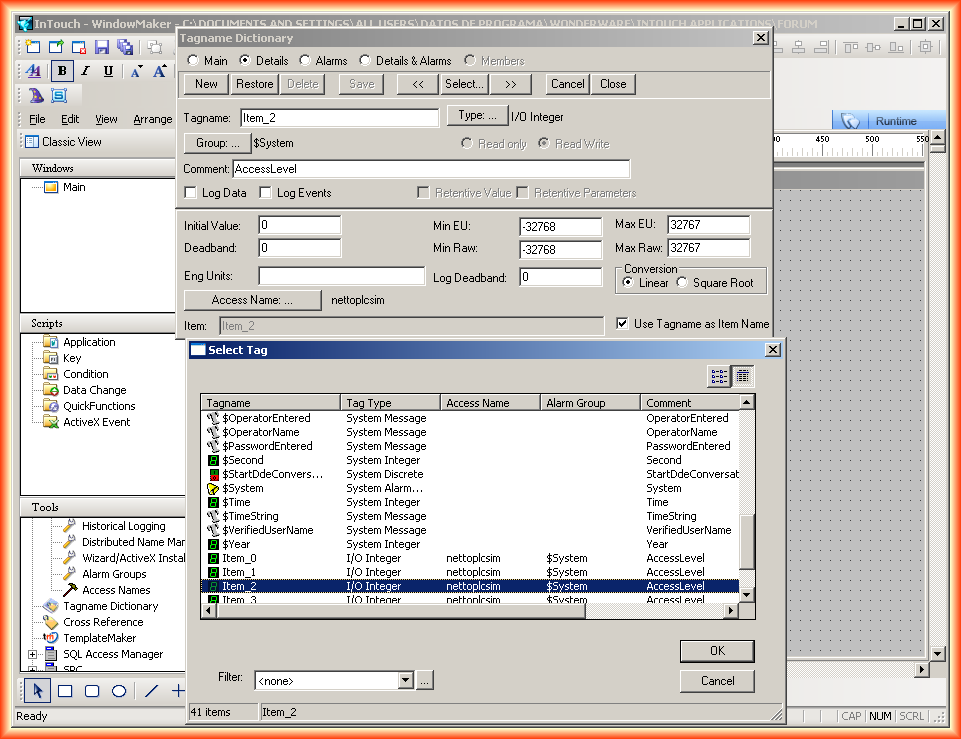
We add the created Items to the Tagname Dictionary, specifying that the Access Name is the one we created earlier.
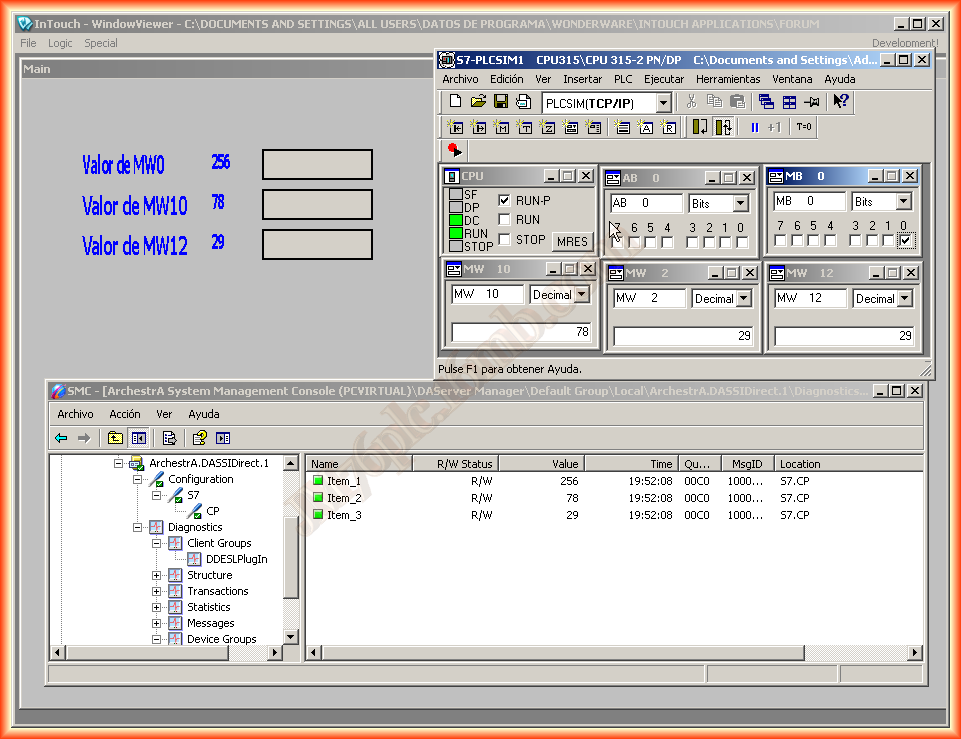
We add some text to our screen with the animation linked to the items we just added, and run the Runtime to check its operation.
As we can see, if I manipulate from PLCSIM, the variables in my SCADA are updated, which means it works perfectly for our tests.

Wednesday, January 2, 2013